Network
The ESP32 will launch a captive browser (under its own SSID) on first normal boot after flashing that will allow you to configure network settings. These settings are accessible from the Network page in the device web UI.
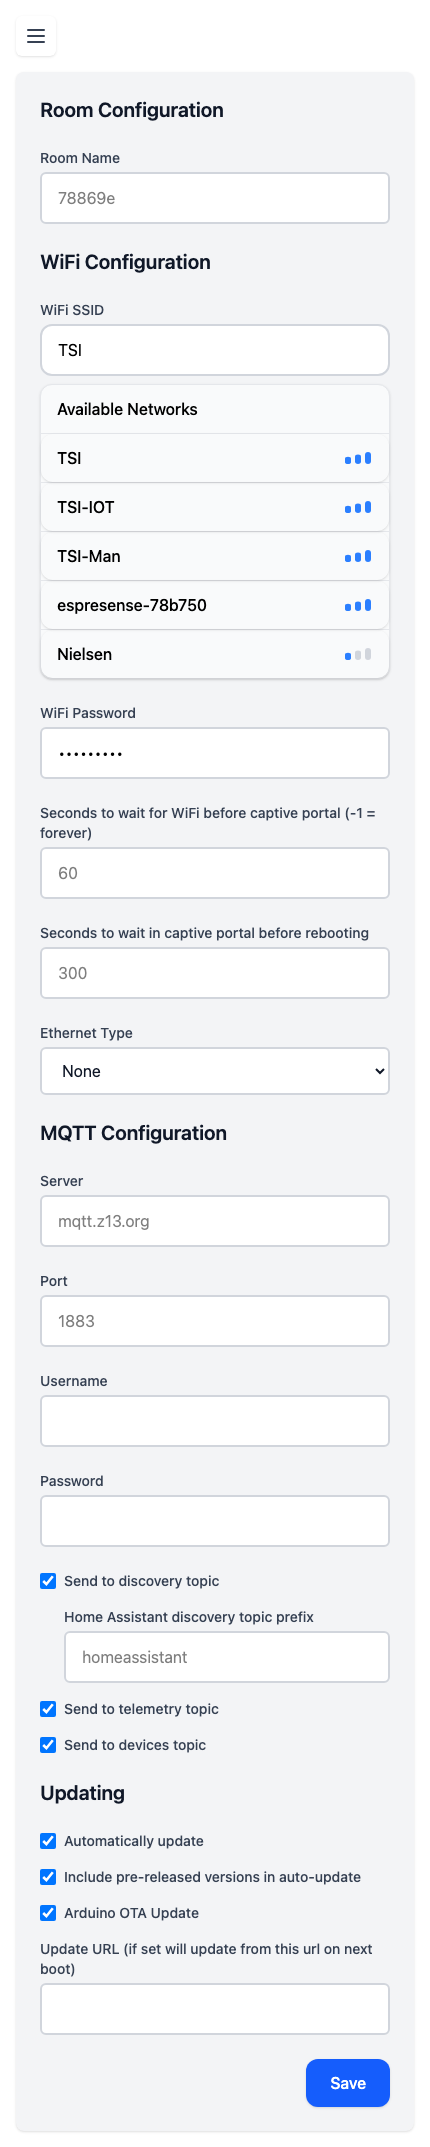
Room Configuration
- Room name - This is the name that will identify this sensor in Home Assistant, as well as the state of mqtt_room sensor. Use a upper/lower word and we’ll slugify it for the places that need that
WiFi Configuration
- WiFi SSID - Enter WiFi SSID
- Available Networks - Dynamic list of available networks
- WiFi Password - Enter WiFi Password
- Seconds to wait in captive portal before rebooting
- Ethernet Type - Select your ethernet connection type if applicable
MQTT Configuration
- Server - MQTT Broker address (e.g. mqtt.example.com) non encrypted mqtt server (SSL is NOT supported)
- Port - MQTT Broker port (e.g. 1883)
- Username - Optional. Note: Since MQTT connections are unencrypted, these credentials will be transmitted in plaintext. Consider using these only in trusted networks.
- Password - Optional.
- Send to discovery topic - enables home assistant mqtt topic (/homeassistant)
- Home Assistant discovery topic prefix - customize the discovery topic prefix
- Send to telemetry topic - enables stats about availability also used by counting
- Send to devices topic - instead of all mashed together topic, this adds a device to the path (much easier to understand in mqtt explorer)
Updating
- Automatically update - If enabled we’ll ask github for the latest version and if it’s not the same version as current update to it
- Include pre-released versions in auto-update - Modifies the above check to include pre-releases
- Arduino OTA Update - If enabled you can remotely flash this device using the standard (espota/arduino) protocol. Keep disabled for less memory usage, and security.
- Update URL - If set will update from this url on next boot
For additional configuration options like scanning, counting, filtering, and calibration, see the Settings page. For LED and GPIO sensor configuration, see the Hardware page.